jamesdorans
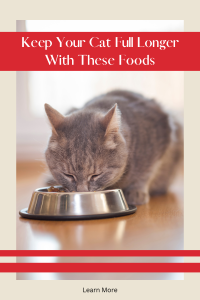
Keep Your Cat Full Longer with These Foods: A Guide to Satisfied Felines
Is your cat a constant food beggar, even after a meal? Do they seem perpetually hungry, leading to overeating or unwanted weight gain? You’re not alone. Many cat owners face the challenge of a seemingly insatiable feline appetite. The good news is that by making smart choices about the types of food you offer, you can help keep your cat feeling fuller for longer, promoting better health, a healthy weight, and a more content companion.
The key to feline satiety lies in understanding a cat’s natural dietary needs and how different macronutrients affect their hunger cues. Cats are obligate carnivores, meaning their bodies are designed to thrive on a diet primarily composed of animal protein and fat, with very limited carbohydrates.
Here are the food characteristics and specific ingredients that can help keep your cat satisfied and less prone to persistent hunger:
1. Prioritize High-Quality Animal Protein
Protein is the cornerstone of a cat’s diet and plays a crucial role in satiety. Protein takes longer to digest than carbohydrates, helping your cat feel full and satisfied for extended periods. Look for cat foods where a named animal protein (like chicken, turkey, salmon, or beef) is the very first ingredient.
- Why it works: High-quality animal protein provides the essential amino acids cats need while signaling to their brain that they’ve consumed adequate nutrients.
- What to look for: Foods with 30-50% protein content on a dry matter basis. Avoid foods with excessive plant-based proteins as primary sources, as these are less bioavailable for cats.
2. Embrace Moisture-Rich Wet Food
One of the simplest and most effective ways to increase satiety and overall health in cats is to incorporate more wet food into their diet. Wet food, by its nature, has a high water content (typically 70-80%), which adds volume to the stomach without adding excessive calories.
- Why it works: The high moisture content helps fill your cat’s stomach, creating a feeling of fullness. It also contributes significantly to hydration, which is vital for kidney and urinary tract health, particularly in indoor cats.
- What to look for: Canned or pouched wet foods with high-quality animal protein as the main ingredient. Gravies and broths can further enhance the filling effect.
3. Choose Moderate, Healthy Fats
While often feared for their calorie density, healthy fats are an essential part of a cat’s diet and contribute to satiety. Fats are calorie-dense, providing concentrated energy, and they slow down digestion, helping to prolong the feeling of fullness.
- Why it works: Fats provide a sustained energy release and promote a feeling of satisfaction.
- What to look for: Foods with moderate fat levels (around 15-25% on a dry matter basis) from animal sources like poultry fat or fish oil. Omega-3 fatty acids (DHA, EPA) found in fish oil also offer anti-inflammatory benefits.
4. Opt for Low Carbohydrate Formulas
Cats have a limited physiological need for carbohydrates. Diets high in simple carbohydrates can lead to rapid spikes and drops in blood sugar, potentially contributing to feelings of hunger shortly after eating. Excess carbs are also readily stored as fat, increasing the risk of obesity.
- Why it works: Limiting carbohydrates helps prevent blood sugar rollercoasters, leading to more stable energy levels and a more consistent feeling of fullness.
- What to look for: Cat foods with carbohydrates typically under 10-15% on a dry matter basis. Avoid foods with large amounts of corn, wheat, soy, or other starchy fillers.
5. Consider Added Fiber (in Moderation)
While cats don’t need a lot of fiber, a moderate amount can aid digestion, help regulate blood sugar, and contribute to a feeling of fullness. Certain types of fiber can also help manage hairballs.
- Why it works: Fiber adds bulk to the stool and can help slow down digestion.
- What to look for: Small amounts of ingredients like psyllium husk, beet pulp, or pumpkin in the ingredient list. Overdoing fiber can dilute nutrient absorption, so moderation is key.
Beyond the Bowl: Feeding Strategies
Even with the right food, how you feed your cat can impact their satiety. Consider using puzzle feeders or slow-feeder bowls to make mealtime more engaging and prolong the eating experience. Dividing daily portions into two or three smaller meals can also help manage hunger throughout the day.
By focusing on high-quality, animal-based proteins, moisture-rich wet foods, healthy fats, and low carbohydrates, you can help your cat feel truly satisfied after their meals, leading to a healthier weight, fewer food-related pleas, and a happier cat overall. Always consult with your veterinarian to tailor dietary advice to your cat’s specific health needs and activity level.
The Best Diet For Indoor Cats: Nourishing Your Feline Friend for a Long, Healthy Life
Introduction
Indoor cats live a different lifestyle than their outdoor counterparts – less activity, different environmental stressors. Their diet needs to reflect these differences to ensure optimal health, prevent common indoor cat ailments, and promote longevity.
I. Understanding the Unique Needs of Indoor Cats
- Reduced Activity Levels:
- Indoor cats typically burn fewer calories.
- Higher risk of obesity, which leads to other health issues (diabetes, joint problems).
- Diet needs to be calorie-controlled.
- Hairball Management:
- Indoor cats groom more, often ingesting more fur.
- Importance of fiber in the diet to help pass hairballs.
- Hydration:
- Often less access to natural water sources (puddles, dew).
- Crucial for urinary tract health (common issue in indoor cats).
- Emphasis on moisture-rich diets.
- Environmental Enrichment (Dietary Aspect):
- Food can be a source of mental stimulation.
- Consider puzzle feeders.
II. Key Nutritional Components of an Ideal Indoor Cat Diet
- High-Quality Animal Protein:
- Cats are obligate carnivores – they must have meat.
- Lean meats (chicken, turkey, fish) as primary ingredients.
- Avoid excessive plant-based proteins as primary sources.
- Importance of essential amino acids like taurine (vital for heart and eye health).
- Moderate Fat Content:
- Energy source, but needs to be balanced due to lower activity.
- Healthy fats (omega-3 and omega-6 fatty acids) for skin, coat, and joint health.
- Sources: fish oil, flaxseed (though cats don’t convert plant omegas as efficiently).
- Low Carbohydrates:
- Cats have limited ability to digest and utilize carbs.
- High carb diets contribute to obesity and diabetes.
- Avoid fillers like corn, wheat, soy.
- Appropriate Fiber:
- Aids digestion, prevents constipation, and helps with hairball passage.
- Sources: psyllium husk, beet pulp, certain vegetables.
- Not too much, as it can reduce nutrient absorption.
- Essential Vitamins and Minerals:
- Ensuring a complete and balanced formula.
- Calcium, phosphorus, Vitamin A, B vitamins, etc.
III. Diet Types: Wet, Dry, or a Combination?
- Wet Food (Canned/Pouches):
- Pros: High moisture content (excellent for hydration and urinary health), often higher in protein and lower in carbs.
- Cons: More expensive, shorter shelf life once opened, can contribute to dental issues if not supplemented with dental care.
- Dry Food (Kibble):
- Pros: Convenient, cost-effective, aids in dental hygiene (some kibbles are specifically designed for this).
- Cons: Low moisture (can contribute to dehydration), often higher in carbohydrates.
- Combination Feeding:
- Often the best of both worlds.
- Offers hydration from wet food and convenience/dental benefits from dry.
- Monitor calorie intake carefully.
- Raw/Homemade Diets:
- Discuss briefly: require extensive research and veterinary guidance to ensure nutritional completeness and safety from pathogens. Not recommended without expert consultation.
IV. Practical Feeding Tips for Indoor Cats
- Portion Control: Follow feeding guidelines based on weight, age, and activity, but adjust as needed. Use a measuring cup.
- Scheduled Meals: Two to three small meals a day rather than free-feeding can help manage weight.
- Fresh Water: Always available, in multiple locations, consider a fountain.
- Treats in Moderation: Choose healthy, low-calorie options.
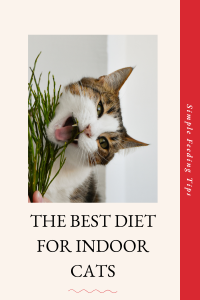
- Cat Grass: Offer cat-safe plants like oat or wheatgrass for enrichment and fiber (as seen in the image!).
- Regular Vet Check-ups: To monitor weight and overall health.
Conclusion
A thoughtfully chosen diet is fundamental to an indoor cat’s health and happiness. Final thought: By prioritizing high-quality protein, proper hydration, and portion control, you can help your feline friend live a long, vibrant life indoors.
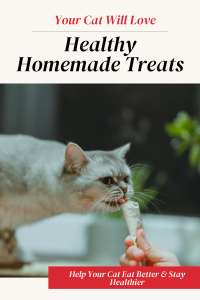
Your Cat Will Love – Healthy Homemade Treats
Healthy Homemade Treats: A Delicious Path to a Happier, Healthier Cat
As devoted cat parents, we want nothing but the best for our feline companions. We meticulously choose their food, ensure they have comfortable resting spots, and shower them with affection. But when it comes to treats, many of us reach for the readily available, often highly processed options found in pet stores. While convenient, these commercial treats can sometimes contain questionable ingredients, fillers, and artificial additives that offer little nutritional value. What if there was a way to provide your beloved cat with delectable snacks that are not only irresistibly tasty but also genuinely beneficial for their health? Enter the wonderful world of healthy homemade cat treats.
Why Go Homemade? The Benefits for Your Feline Friend
The decision to embark on a homemade treat journey for your cat is more than just a culinary adventure; it’s a commitment to their well-being. Here’s why making your own cat treats is a game-changer:
- Ingredient Control: You Know Exactly What’s Going In. This is arguably the most significant advantage. When you make treats yourself, you have complete control over every single ingredient. You can select fresh, human-grade meats, vegetables, and other wholesome components, ensuring there are no artificial colors, flavors, preservatives, or unnecessary fillers that can be detrimental to your cat’s health. This is especially crucial for cats with allergies or sensitivities, as you can tailor recipes to exclude specific problematic ingredients.
- Enhanced Nutrition: Boosting Their Diet. Commercial treats, even those marketed as “healthy,” often prioritize palatability over nutritional density. Homemade treats, on the other hand, can be packed with vitamins, minerals, and essential nutrients that complement your cat’s regular diet. You can incorporate lean proteins, fiber-rich vegetables, and healthy fats that contribute to their overall vitality.
- Avoiding Harmful Additives: A Cleaner Diet. Many commercial treats contain a cocktail of artificial additives, including dyes, BHA, BHT, and ethoxyquin, which are used for preservation or visual appeal but have been linked to various health issues in pets. By going homemade, you eliminate these questionable chemicals, providing a cleaner and safer dietary experience for your cat.
- Tailored to Preferences: A Personalized Culinary Experience. Just like humans, cats have distinct tastes and preferences. One cat might adore salmon, while another prefers chicken. Homemade treats allow you to experiment and discover what your individual cat truly loves. This personalization not only makes treat time more enjoyable for them but also ensures they’re actually consuming the beneficial ingredients.
- Cost-Effective in the Long Run: While the initial outlay for quality ingredients might seem a bit more, making treats in bulk at home can often be more cost-effective than repeatedly buying premium commercial treats. Plus, you’re investing in your cat’s long-term health, potentially reducing future veterinary bills.
- Strengthening Your Bond: A Labor of Love. There’s something undeniably special about offering your cat a treat you’ve lovingly prepared yourself. It’s a tangible expression of your care and affection, and your cat will undoubtedly pick up on the positive energy associated with these special snacks. It can be a wonderful bonding experience for both of you.
Essential Considerations Before You Start Baking
Before you don your apron and preheat the oven, a few crucial points need to be considered to ensure the safety and health of your feline chef’s critics:
- Consult Your Veterinarian: Always, always, always discuss any significant dietary changes, including the introduction of homemade treats, with your veterinarian. They can offer personalized advice based on your cat’s specific health needs, age, and any existing conditions. This is particularly important if your cat has kidney disease, diabetes, or other chronic illnesses.
- Familiarize Yourself with Cat-Safe Ingredients: Not all human foods are safe for cats. A definitive list of toxic foods includes onions, garlic, chives, chocolate, grapes, raisins, avocado, alcohol, and xylitol (an artificial sweetener). Always double-check ingredients if you’re unsure. Stick to lean cooked meats, certain cooked vegetables, and limited grains.
- Portion Control is Key: Even healthy treats can lead to weight gain if overfed. Treats should only make up a small percentage (ideally less than 10%) of your cat’s daily caloric intake. Remember, they are supplements, not meal replacements.
- Proper Storage is Crucial: Homemade treats lack the artificial preservatives found in commercial varieties. This means they have a shorter shelf life. Store them in airtight containers in the refrigerator for a few days, or freeze them for longer storage (up to a few months). Always check for spoilage before offering them to your cat.
- Cooking Meats Thoroughly: Any meat used in cat treats must be cooked thoroughly to eliminate harmful bacteria like Salmonella. Avoid raw meat, even if your cat is accustomed to it, when making treats that will be stored.
Purr-fectly Simple Recipes to Get You Started
Here are a few easy, healthy, and cat-approved homemade treat recipes to spark your culinary creativity:
1. Tuna Bites:
- Ingredients: 1 can (5 oz) plain tuna in water (drained), 1/4 cup oat flour (or finely ground oats), 1 egg (lightly beaten).
- Instructions: Preheat oven to 350°F (175°C). In a bowl, mash the drained tuna. Add the oat flour and beaten egg, mixing until a firm dough forms. Roll the dough into small, pea-sized balls or flatten and cut into tiny squares. Place on a parchment-lined baking sheet. Bake for 10-12 minutes, or until firm and slightly golden. Let cool completely before serving. Store in the refrigerator.
2. Chicken & Sweet Potato Chews:
- Ingredients: 1/2 cup cooked and shredded chicken breast (no seasoning), 1/4 cup cooked and mashed sweet potato (plain).
- Instructions: Preheat oven to 300°F (150°C). In a bowl, combine the shredded chicken and mashed sweet potato. Mix well until thoroughly combined. Roll the mixture into small, thin logs or flatten and cut into small shapes. Place on a parchment-lined baking sheet. Bake for 20-25 minutes, or until the treats are firm and slightly dry. Allow to cool completely. Store in the refrigerator.
3. Sardine Fishy Delights:
- Ingredients: 1 can (3.75 oz) sardines in water (drained and rinsed well), 1/4 cup whole wheat flour, 1 tablespoon fresh parsley (finely chopped, optional, but good for breath!).
- Instructions: Preheat oven to 325°F (160°C). In a bowl, mash the drained and rinsed sardines. Add the whole wheat flour and parsley, mixing until a thick dough forms. Roll out the dough to about 1/4 inch thickness and use a small cookie cutter (or a knife) to cut into tiny shapes. Place on a parchment-lined baking sheet. Bake for 15-20 minutes, or until firm and slightly crisp. Cool completely before serving. Store in the refrigerator.
4. Simple Salmon Jerky:
- Ingredients: 4 oz boneless, skinless salmon fillet.
- Instructions: Preheat oven to 275°F (135°C). Slice the salmon very thinly against the grain (this helps it dry faster). Arrange the salmon slices in a single layer on a parchment-lined baking sheet. Bake for 1.5 to 2 hours, flipping halfway through, or until the salmon is completely dry and brittle. Allow to cool completely. Break into small pieces. Store in an airtight container in the refrigerator for up to a week, or freeze for longer.
5. Oat & Catnip Cookies:
- Ingredients: 1/2 cup finely ground oats, 2 tablespoons dried catnip, 1 tablespoon water (add more if needed to form a dough).
- Instructions: Preheat oven to 300°F (150°C). In a bowl, combine the ground oats and catnip. Gradually add water, mixing until a stiff dough forms. Roll the dough into small, flat discs or use tiny cookie cutters. Place on a parchment-lined baking sheet. Bake for 10-15 minutes, or until firm. Cool completely before offering. Store in an airtight container at room temperature.
Tips for Success and Happy Cats:
- Start Small: When introducing new treats, offer just one or two at a time to see how your cat reacts.
- Texture Matters: Some cats prefer crunchy treats, while others like softer, chewier ones. Experiment with baking times to achieve different textures.
- Get Creative with Molds: Small silicone molds (like those for candy or ice cubes) can create fun shapes and portion sizes.
- Involve the Family: Making treats can be a fun activity for the whole family, even kids (with supervision).
- Observe and Adjust: Pay attention to your cat’s reactions. If they love a particular ingredient, incorporate more of it. If they turn their nose up, try something different next time.
- Don’t Be Afraid to Experiment: Once you’re comfortable with basic recipes, feel free to experiment with other cat-safe ingredients like cooked chicken livers (a feline favorite!), pumpkin puree (great for digestion), or even a tiny pinch of nutritional yeast for a cheesy flavor.
Making healthy homemade treats for your cat is a rewarding endeavor that offers numerous benefits. It’s a way to provide them with superior nutrition, avoid harmful additives, and strengthen the special bond you share. So, step into your kitchen, embrace your inner chef, and prepare to delight your feline companion with delicious, wholesome treats made with love. Your cat will not only love them, but they’ll thrive on them, too.
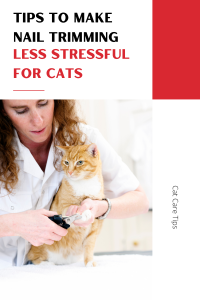
Tips to Make Nail Trimming Less Stressful for the Cat
In the quiet hum of many cat-owning households, one task often looms large with trepidation: nail trimming. What should be a routine part of feline care can quickly escalate into a wrestling match, leaving both cat and human frazzled. However, with patience, the right approach, and a few key tips, nail trimming can become a less stressful, even tolerable, experience for your beloved feline friend.
 The first, and perhaps most crucial, tip is early introduction and positive association. Ideally, start handling your kitten’s paws from a young age, gently touching their toes and rewarding them with treats or praise. This desensitization process teaches them that paw handling is not a threat. Even with an adult cat, you can gradually introduce positive associations. Before you even bring out the clippers, simply touch their paws, offer a high-value treat, and release. Repeat this multiple times a day, slowly increasing the duration of the touch.
Next, choose the right time and place. Avoid attempting nail trims when your cat is overly energetic, stressed, or hungry. A calm, quiet environment is key. Consider trimming after a play session when your cat is naturally more relaxed, or when they are in a sleepy state, perhaps curled up on your lap. Ensure the room is well-lit so you can clearly see the quick, the sensitive pink part of the nail that contains blood vessels and nerves. Cutting into the quick is painful and can make your cat extremely averse to future trims.1
Invest in quality tools. Sharp, cat-specific nail clippers are essential. Dull clippers can crush the nail, causing discomfort and splintering.2 There are various types available, including scissor-style and guillotine-style.3 Experiment to see which you find easiest to use and which your cat tolerates best. Some owners also find a nail grinder helpful, as it provides a smoother finish and reduces the risk of cutting too deep, though this also requires a period of desensitization to the sound and vibration.
When it’s time to trim, approach with confidence and gentleness. Hold your cat securely but not restrictively. A towel wrap (burrito style) can be helpful for particularly squirmy cats, providing a sense of security and limiting their ability to struggle.4 Gently extend each toe, isolating the nail. Press lightly on the top of the paw and the bottom of the toe pad to extend the nail fully. Only snip the very tip of the clear part of the nail, avoiding the quick. If you’re unsure, err on the side of taking off too little rather than too much.
Keep it short and sweet. Don’t try to trim all of your cat’s nails at once, especially when you’re starting out. Aim for one or two nails per session, gradually increasing the number as your cat becomes more comfortable. Even if you only manage one nail, celebrate the small victory with a treat and praise. This positive reinforcement reinforces that the experience is not something to be feared.
Finally, remain calm and patient. Cats are highly perceptive and can pick up on your stress.5 If you’re anxious, your cat will likely become anxious too. Take deep breaths, speak in a soothing voice, and remember that setbacks can happen. If a session goes poorly, don’t push it. Try again later or the next day. Consistency and a positive attitude will ultimately lead to a less stressful nail trimming routine for both you and your feline companion, ensuring their paw health and your peace of mind.
Sources:
- American Society for the Prevention of Cruelty to Animals (ASPCA). “Trimming Your Cat’s Claws.” ASPCA.org. Available at: https://www.aspca.org/pet-care/cat-care/trimming-your-cats-claws (Accessed July 28, 2025).
- The Humane Society of the United States. “Trimming Your Cat’s Claws.” Humanesociety.org. Available at: https://www.www.humanesociety.org/resources/trimming-your-cats-claws (Accessed July 28, 2025).
- Cornell Feline Health Center. “How to Trim a Cat’s Claws.” Vet.cornell.edu/departments/cornell-feline-health-center. Available at: https://www.vet.cornell.edu/departments/cornell-feline-health-center/health-information/periodical-articles/cat-watch/how-trim-cats-claws (Accessed July 28, 2025).
Grooming Kit Essentials for New Cat Parents
Everything You Need to Keep Your Feline Friend Healthy and Happy
Bringing a new cat into your home is an exciting and heartwarming experience. Whether you’ve adopted a playful kitten or a calm adult cat, becoming a pet parent means taking on the responsibility of your furry companion’s well-being. One of the most important — and often overlooked — aspects of cat care is grooming.
Contrary to popular belief, cats can’t handle all grooming tasks on their own. While they do spend a significant amount of time licking and cleaning their fur, they still need your help to stay clean, healthy, and comfortable. Regular grooming reduces shedding, prevents mats, minimizes hairballs, and helps you spot health problems early.
To help you start off on the right paw, here’s a comprehensive guide to grooming kit essentials every new cat parent should have.
1. Brush or Comb (or Both)
Why It’s Essential:
Brushing is the foundation of any grooming routine. It helps remove loose fur, dirt, and dander, while also preventing matting — especially in long-haired breeds.
What to Look For:
- Slicker brushes are great for long-haired cats and help detangle knots.
- Bristle brushes are ideal for short-haired cats to smooth the coat and remove debris.
- Metal combs work well for delicate areas like behind the ears or under the legs.
- Consider getting a de-shedding tool like the FURminator to reduce loose hair and shedding.
Pro Tip:
Start slow, and brush in the direction of the hair growth. Reward your cat with treats to build a positive association.
2. Nail Clippers
Why It’s Essential:
Overgrown claws can be painful, lead to ingrown nails, or cause damage to furniture and skin. Trimming your cat’s nails every few weeks prevents these issues.
What to Look For:
- Scissor-style clippers are easy to control and precise.
- Guillotine-style clippers are also available but may be harder to use on wiggly cats.
- Consider a nail grinder if you’re nervous about clipping or want a smoother finish.
Pro Tip:
Get your cat used to paw handling gradually. Always avoid cutting into the “quick” (the pink area inside the nail) as it can cause pain and bleeding.
3. Cat Shampoo and Conditioner
Why It’s Essential:
Although most cats don’t need frequent baths, there are times when shampooing is necessary — such as after a messy accident or to treat skin issues.
What to Look For:
- Cat-specific shampoos with mild, pH-balanced formulas.
- Look for hypoallergenic or oatmeal-based options if your cat has sensitive skin.
- Waterless shampoos or wipes are great for quick clean-ups or reluctant bathers.
Pro Tip:
Never use human shampoo or dog shampoo on cats — it can irritate their skin or even be toxic.
4. Grooming Wipes
Why It’s Essential:
For in-between cleanups or for cats who hate water, grooming wipes are a lifesaver. They help remove dirt, allergens, and dander without the need for a full bath.
What to Look For:
- Fragrance-free or lightly scented wipes that are specifically made for cats.
- Alcohol-free formulas to prevent drying out their skin.
Pro Tip:
Wipes can also be used on paws after litter box use or walks outside (for leash-trained cats).
5. Ear Cleaner and Cotton Balls
Why It’s Essential:
Cats can develop wax buildup or ear infections if their ears aren’t kept clean — especially breeds with folded ears like Scottish Folds.
What to Look For:
- A veterinarian-recommended ear cleaner formulated for cats.
- Soft cotton balls or pads — avoid cotton swabs, which can damage the ear canal.
Pro Tip:
Check ears regularly for redness, foul odor, or excessive wax — these may indicate an infection and require a vet visit.
6. Toothbrush and Toothpaste
Why It’s Essential:
Dental health is often neglected in cats, yet gum disease and tooth decay can lead to serious health issues. Regular brushing helps prevent plaque and tartar buildup.
What to Look For:
- A cat-specific toothbrush (finger brushes are great for beginners).
- Enzymatic cat toothpaste in flavors cats enjoy like chicken or tuna.
Pro Tip:
Never use human toothpaste — it contains fluoride and xylitol, which are toxic to cats. Start slow and let your cat get used to the taste and feel.
7. Deshedding Tool
Why It’s Essential:
If your cat sheds a lot or tends to get hairballs, a deshedding tool like the FURminator can make a big difference. It removes the loose undercoat without damaging the topcoat.
What to Look For:
- A tool that matches your cat’s coat length (short or long hair).
- Ergonomic grip for ease of use.
Pro Tip:
Use 1–2 times a week for best results, especially during seasonal shedding periods.
8. Styptic Powder or Gel
Why It’s Essential:
Even the most careful pet parent can accidentally clip the quick of a cat’s nail. Styptic powder stops bleeding quickly and helps prevent infection.
What to Look For:
- A pet-safe styptic product — it usually comes in powder, gel, or pencil form.
Pro Tip:
Keep it nearby whenever you trim nails, just in case. Apply gently with pressure if you nick a nail.
9. Grooming Gloves
Why It’s Essential:
Some cats dislike brushes, but grooming gloves feel more like petting. They’re a great way to remove loose fur while bonding with your cat.
What to Look For:
- Gloves with soft silicone tips for massaging and hair removal.
- Machine washable and adjustable fit.
Pro Tip:
Perfect for short-haired breeds or nervous cats who need a gentler grooming experience.
10. Storage Organizer or Caddy
Why It’s Essential:
Keeping all your grooming tools in one place saves time and stress — for you and your cat.
What to Look For:
- A small tote or organizer with compartments.
- Waterproof or easy-to-clean material.
Pro Tip:
Keep your grooming kit in a quiet, accessible place so you can groom your cat in a calm environment.
Final Thoughts
Grooming isn’t just about keeping your cat looking pretty — it’s a vital part of their health and happiness. Establishing a regular grooming routine helps you bond with your feline friend, reduces shedding around your home, and allows you to catch health problems early. By investing in the right grooming tools and using them with patience and care, you’re setting your cat up for a lifetime of comfort.
Whether you’re brushing a fluffy Maine Coon or wiping down a sleek Siamese, having a well-stocked grooming kit ensures that you’re always prepared to give your cat the care they deserve.
Check list For Cat Grooming.
✅ Cat Grooming Kit Essentials Checklist
🪮 Brushing & Shedding Control
- Slicker Brush – For detangling and removing mats (great for long-haired cats)
- Bristle Brush – Ideal for short-haired cats
- Metal Comb – Useful for delicate areas like ears and legs
- Deshedding Tool (e.g., FURminator) – To reduce shedding and hairballs
- Grooming Gloves – For sensitive or nervous cats
✂️ Nail Care
- Cat Nail Clippers (scissor-style or guillotine-style)
- Nail Grinder (optional for smooth finishing)
- Styptic Powder or Gel – Stops bleeding if the nail quick is cut
🛁 Bathing & Cleaning
- Cat-Specific Shampoo – Gentle and pH-balanced
- Waterless Shampoo or Foam Cleanser – For quick cleanups
- Cat Grooming Wipes – For paws, fur, and hygiene touch-ups
👂 Ear Care
- Cat Ear Cleaner – Vet-approved formula
- Cotton Balls or Pads – To gently wipe ears
(Avoid Q-tips – they can damage ear canals)
😺 Dental Care
- Cat Toothbrush – Finger brush or soft-bristled brush
- Cat Toothpaste – Enzymatic and pet-safe (never use human toothpaste)
📦 Storage & Organization
- Grooming Kit Caddy or Organizer – Keeps all tools neat and accessible
- Towel or Mat – To catch fur and keep surfaces clean during grooming
🐾 BONUS TIPS
- Introduce grooming slowly and use treats to reward calm behavior
- Keep sessions short at first, especially with kittens or shy cats
- Groom in a quiet, stress-free environment
Grooming Mistakes Most Cat Owners Make
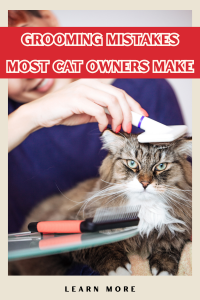
Cats are often perceived as self-sufficient grooming experts, meticulously cleaning themselves with their barbed tongues and nimble paws. This innate fastidiousness can sometimes lull cat owners into a false sense of security, leading them to believe that their feline companions require minimal, if any, human intervention in their grooming routine. However, this is a common misconception that can lead to a host of problems, from painful matting and skin irritations to behavioral issues.
While a cat’s self-grooming is impressive, it’s not always sufficient, especially for indoor cats, long-haired breeds, seniors, or those with health conditions. Recognizing and avoiding common grooming mistakes can make a world of difference in your cat’s comfort, health, and overall well-being. Let’s delve into the grooming missteps most cat owners make and how to avoid them.
1. Neglecting Regular Brushing (or Brushing Incorrectly)
This is arguably the most pervasive grooming mistake. Many owners underestimate the importance of regular brushing, assuming their cat’s self-grooming is enough.
- The Mistake: Not brushing often enough, especially for long-haired cats or heavy shedder breeds. Using the wrong type of brush, or brushing too harshly.
- The Impact: Leads to excessive shedding throughout the home, increased hairball formation (which can cause digestive blockages), and the development of painful mats and tangles. Harsh brushing can cause “brush burn” or skin irritation.
- The Solution: Establish a consistent brushing routine. For short-haired cats, 2-3 times a week may suffice. Long-haired cats often need daily brushing. Invest in appropriate tools: a de-shedding tool (like a Furminator for heavy shedders, used cautiously), a slicker brush, and a wide-toothed comb. Brush gently, always in the direction of hair growth, and pay extra attention to areas prone to matting like armpits, behind ears, and the belly.
2. Ignoring Matting (or Trying to Cut Them Out Incorrectly)
Mats are a serious problem that many owners either overlook or try to fix dangerously.
- The Mistake: Allowing small tangles to progress into large, dense mats. Attempting to cut out mats with scissors, which often results in accidentally cutting the cat’s skin.
- The Impact: Mats are incredibly painful, pulling on the skin and restricting movement. They can hide skin infections, parasites, and even impede blood flow. Cutting them out with household scissors is extremely risky due to how thin and mobile a cat’s skin is.
- The Solution: Prevention through regular brushing is key. If you find a small, loose mat, try to gently work it out with your fingers and a comb, starting from the edges. For larger, tighter, or skin-bound mats, do not attempt to cut them out yourself. This is a job for a professional groomer or veterinarian who can safely shave them off.
3. Improper Nail Trimming (or Skipping It Entirely)
Many owners fear trimming their cat’s nails, leading to overgrown claws.
- The Mistake: Not trimming nails at all, or cutting too much and hitting the “quick” (the blood vessel and nerve within the nail).
- The Impact: Overgrown nails can curve into the paw pads, causing excruciating pain, infection, and lameness. They can also snag on carpets and furniture, leading to broken claws or injuries. Hitting the quick causes pain and bleeding, making future trims terrifying for the cat.
- The Solution: Start young and make it a positive experience with treats. Use sharp, cat-specific nail clippers. Only snip the clear, pointed tip of the nail, avoiding the pink quick. If your cat has dark nails where the quick isn’t visible, trim only the very tip. Have styptic powder (or cornstarch/flour) on hand to stop bleeding if you accidentally cut too deep. If unsure, ask your vet or a groomer for a demonstration.
4. Infrequent or Incorrect Bathing
While most cats rarely need baths, some situations call for one, and owners often get it wrong.
- The Mistake: Bathing a cat too frequently (drying out skin/coat) or using human shampoos/soaps. Not preparing properly, leading to a stressful and dangerous experience for the cat.
- The Impact: Frequent bathing can strip essential oils from a cat’s skin and coat, leading to dryness, flakiness, and irritation. Human shampoos are formulated for a different pH balance and can cause skin problems. A chaotic bath experience can traumatize a cat, making future necessary baths impossible.
- The Solution: Only bathe when truly necessary (e.g., covered in something toxic/sticky, severe matting, veterinarian-prescribed medicated baths). Always use a cat-specific shampoo. Prepare everything beforehand: lukewarm water, rubber mat for traction, towels, cotton balls for ears, and treats. Keep the experience calm and quiet. Rinse thoroughly to prevent skin irritation from residue.
5. Neglecting Dental Care
While not strictly “coat” grooming, dental health is a critical part of overall grooming and is frequently overlooked.
- The Mistake: Assuming dry kibble cleans teeth, or ignoring bad breath as “normal cat breath.”
- The Impact: Dental disease (plaque, tartar, gingivitis, periodontal disease) is rampant in cats, causing pain, difficulty eating, and can lead to serious systemic health issues if bacteria from the mouth enter the bloodstream. Bad breath is a sign of infection, not just bad hygiene.
- The Solution: Start a home dental care routine with a cat-specific toothbrush and toothpaste (never human toothpaste!). Aim for daily brushing if possible. Provide dental treats or chew toys approved by your vet. Schedule regular professional dental cleanings at your vet’s office as recommended.
6. Ignoring Stress Signals During Grooming
Cats communicate discomfort, but owners often miss the cues.
- The Mistake: Pushing through when a cat is hissing, growling, swatting, or trying to escape.
- The Impact: Forcing grooming creates negative associations, leading to a cat that actively resists and becomes more aggressive during future attempts. It damages the bond of trust.
- The Solution: Pay attention to your cat’s body language. If they show signs of stress (tail flicking, flattened ears, dilated pupils, tense body, vocalization), stop the session. Keep sessions short and positive, ending before they get stressed. Break down grooming tasks into smaller steps and reward calm behavior with treats and praise.
7. Forgetting the Dewclaws
The dewclaw is often overlooked, leading to painful issues.
- The Mistake: Remembering to trim the main claws but forgetting the dewclaws (the small claw on the inner side of the front paws, like a thumb).
- The Impact: Since dewclaws don’t touch the ground, they don’t wear down naturally and are highly prone to growing into the paw pad, causing severe pain and infection.
- The Solution: Always check and trim the dewclaws during every nail trimming session.
8. Not Adapting Grooming to Age or Health Changes
A cat’s grooming needs change throughout their life.
- The Mistake: Maintaining the same grooming routine for a senior cat as for a young adult, or not adjusting for health conditions.
- The Impact: Older cats may have arthritis, making self-grooming painful or difficult, leading to mats and dirty coats. Cats with underlying health issues (e.g., obesity, dental pain) may also neglect self-grooming.
- The Solution: Be extra vigilant with grooming for senior cats or those with health problems. They will likely need more frequent brushing, bathing, and nail trims as they may be unable to reach certain areas. Consult your vet for advice tailored to their specific needs.
By understanding and rectifying these common grooming mistakes, you can transform a potentially stressful chore into a beneficial and bonding experience for both you and your feline companion. Proactive, gentle, and consistent grooming is a cornerstone of responsible cat ownership, ensuring your beloved cat lives a life of comfort, health, and endless purrs.
How to Bathe A Cat Without Stressing Them Out
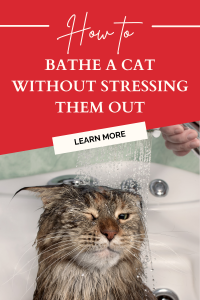
Splash Without Stress: A Gentle Guide to Bathing Your Cat
The mere mention of bathing a cat often conjures images of scratched arms, frantic meows, and a very unhappy feline. While many cats spend their lives avoiding water, there are times when a bath becomes a necessity – whether due to excessive soiling, matting, skin conditions, or even just a particularly messy adventure. The good news is that with the right preparation, a calm approach, and a focus on minimizing stress, bathing your cat doesn’t have to be a traumatic experience for either of you.
When is a Bath Necessary?
Unlike dogs, most cats are fastidious self-groomers and rarely require full baths. However, a bath might be warranted if:
- They’re heavily soiled: If your cat gets into something toxic, sticky, or truly filthy that self-grooming can’t handle.
- They have mobility issues: Older, arthritic, or overweight cats may struggle to groom themselves effectively.
- They have skin conditions: Your vet might recommend medicated baths for fleas, allergies, or other dermatological issues.
- They’re a long-haired breed: Some long-haired cats, especially those with very dense coats, can benefit from occasional bathing to prevent matting and manage shedding.
Preparation is Key: Set the Scene for Success
Before you even think about water, thorough preparation is crucial:
- Gather Your Supplies:
- Cat-specific shampoo: Never use human shampoo, as it can irritate your cat’s skin.
- Several towels: Have at least two large, absorbent towels ready.
- Rubber mat or towel for the tub/sink: This provides traction and prevents slipping, which can be very unsettling for a cat.
- Cotton balls: For gently plugging ears to prevent water from entering.
- A small cup or spray nozzle: For rinsing.
- Treats and toys: For distraction and positive reinforcement.
- Grooming brush/comb: To brush your cat before the bath.
- Pre-Bath Grooming: Always brush your cat thoroughly before a bath. This helps remove loose fur and, more importantly, any mats. Wet mats tighten and become almost impossible to remove without painful pulling.
- Trim Nails: Consider trimming your cat’s nails beforehand. This not only makes them more comfortable but also protects you from accidental scratches.
- Create a Calm Environment: Close bathroom doors and windows to prevent escapes. Ensure the water temperature is lukewarm – test it on your inner wrist. A quiet environment with no sudden loud noises is ideal.
The Gentle Bathing Process: Slow and Steady Wins the Race
- Introduce Water Gradually: Don’t just plunk your cat into a full tub of water. Instead, use a shallow amount (a few inches) at the bottom of a sink or tub with a rubber mat. Gently lower your cat in. If using a spray nozzle, keep the pressure low and steady.
- Start from the Neck Down: Wet your cat’s body, avoiding their face and ears. Use the cotton balls in their ears if they tolerate it. You can use a damp washcloth to gently wipe their face later.
- Apply Shampoo Gently: Apply a small amount of cat-specific shampoo, starting from the neck and working your way down to the tail. Lather gently, massaging the coat. Speak in a calm, soothing voice throughout the process.
- Thorough Rinsing is Critical: This is one of the most important steps. Residue from shampoo can irritate your cat’s skin and coat, leading to licking and discomfort. Rinse thoroughly with lukewarm water until the water runs clear and there are no suds left. Again, avoid the face and ears.
- The Towel Wrap: Once rinsed, immediately wrap your cat snugly in a warm, dry towel. Gently blot and rub to absorb as much water as possible. You may need a second towel.
- Warmth and Comfort: Move your cat to a warm, draft-free room to finish drying. You can gently blow-dry on a very low, cool setting if your cat tolerates it, but most prefer towel drying followed by self-grooming. Never use high heat, as it can burn their skin.
- Positive Reinforcement: The moment the bath is over, reward your cat with their favorite treats, praise, and gentle petting. This helps create a positive association with the experience.
Troubleshooting and Patience
- Don’t Force It: If your cat becomes overly stressed or aggressive, stop the bath and try again another day. Forcing them will only make future baths harder.
- Start Young: If you have a kitten, gently introduce them to water early to accustom them to the sensation.
- Consider a Professional: If your cat is truly impossible to bathe at home, a professional groomer or your veterinarian might be able to help.
While bathing a cat may never be their favorite activity, by approaching it with patience, calmness, and proper technique, you can minimize their stress and ensure their health and hygiene needs are met without turning it into a full-blown battle.
Beyond the Bathtub: Why Grooming Matters for Every Indoor Cat
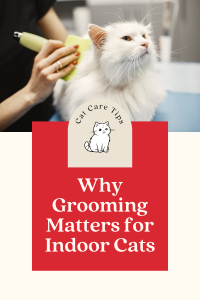
The image of a majestic, wild cat meticulously cleaning its fur is ingrained in our minds. Our domestic felines carry this innate drive for cleanliness, often spending a significant portion of their waking hours meticulously licking, biting, and pawing at their coats. This incredible self-grooming ability sometimes leads cat owners to believe that indoor cats, safe from the elements and outdoor grime, require minimal, if any, human intervention in their grooming routine. However, this couldn’t be further from the truth.
While indoor cats may not encounter the same level of dirt and debris as their outdoor counterparts, the very act of living indoors presents unique grooming challenges that necessitate our attention. Neglecting an indoor cat’s grooming needs can lead to a cascade of problems, impacting not only their appearance but more crucially, their health and comfort. Let’s delve into why grooming is not just a luxury, but a vital component of care for every indoor cat.
1. The Silent Threat: Hairballs and Digestive Health
This is perhaps the most well-known reason why indoor cats need regular grooming. Cats shed continuously, and their barbed tongues, while efficient at removing loose hair, also mean they ingest a significant amount of it. For outdoor cats, some of this hair might be naturally shed or caught on outdoor surfaces. For indoor cats, almost all shed hair ends up in their digestive system.
While occasional hairballs are normal, an excessive accumulation of ingested hair can lead to a range of digestive issues. Large hairballs can cause blockages, leading to vomiting, constipation, reduced appetite, and in severe cases, even require surgical removal. Regular brushing, especially for long-haired breeds or those prone to heavy shedding, helps remove loose hair before it’s swallowed, drastically reducing the risk of hairball formation and promoting a healthier digestive system.
2. Matting: A Painful and Potentially Dangerous Problem
Mats are dense clumps of tangled fur that form when loose, dead hair isn’t removed from the coat. While more common in long-haired breeds, even short-haired cats can develop mats, particularly in high-friction areas like behind the ears, under the legs, or around the hindquarters. For indoor cats, factors like static electricity (common in dry indoor environments) and lack of natural elements (like wind or rough surfaces that might help shed hair) can exacerbate matting.
Mats are incredibly painful. They pull on the cat’s skin, restricting movement and causing discomfort. Beyond the pain, mats can lead to:
- Skin Irritation and Infections: Trapped moisture, dirt, and bacteria beneath mats create a perfect breeding ground for skin infections, hot spots, and parasitic infestations.
- Restricted Blood Flow: Severe, tight mats can even impede circulation to certain areas of the skin.
- Difficulty Grooming Themselves: Once mats form, cats find it even harder to groom themselves, creating a vicious cycle.
Regular brushing and combing prevent mats from forming by removing loose hair before it has a chance to tangle. If mats are already present, professional grooming might be necessary to safely remove them without injuring the cat.
3. Skin and Coat Health: Beyond Just Hair
A cat’s coat is a reflection of its overall health. Regular grooming sessions offer an invaluable opportunity to:
- Distribute Natural Oils: Brushing helps to spread the natural oils produced by your cat’s skin throughout their coat, keeping it healthy, shiny, and waterproof. This natural barrier protects their skin from dryness and irritation.
- Monitor for Skin Issues: During grooming, you can inspect your cat’s skin for any lumps, bumps, sores, rashes, dry patches, fleas, ticks, or other parasites. Early detection of these issues can lead to quicker and more effective treatment.
- Reduce Allergens: For human allergy sufferers, regular brushing can help reduce the amount of dander (dead skin flakes) and loose fur in the environment, potentially easing allergy symptoms.
4. Nail Care: Preventing Pain and Damage
Indoor cats don’t have the same opportunities as outdoor cats to naturally wear down their claws by climbing trees or walking on rough surfaces. As a result, their nails can grow excessively long, leading to:
- Ingrown Nails: The most painful consequence, where the nail curls around and grows into the paw pad, causing severe pain, lameness, and infection.
- Snagging and Tearing: Long nails are more prone to getting caught on carpets, blankets, or furniture, potentially leading to painful tears or broken claws.
- Behavioral Issues: Pain from long nails can make cats irritable, reluctant to jump or play, and can even contribute to litter box avoidance if stepping becomes uncomfortable.
Regular nail trimming (typically every 2-4 weeks) is crucial for indoor cats to prevent these issues.
5. Early Detection of Health Problems
Grooming sessions are more than just cosmetic. They serve as a routine “health check.” By regularly handling your cat and examining their fur and skin, you are more likely to notice subtle changes that could indicate an underlying health issue. This includes:
- Changes in Weight: Feeling ribs or a prominent spine could signal weight loss; difficulty feeling them could indicate weight gain.
- Lumps or Bumps: Any new growths should always be checked by a veterinarian.
- Sore Spots: Your cat might flinch or react to touch in a particular area, indicating pain.
- Unusual Odors: Persistent bad odors from the coat, mouth, or ears can signal infections or other problems.
- Dental Issues: While not direct grooming, it’s an excellent time to peek at their teeth for signs of tartar or gum disease.
6. Behavioral Benefits and Bonding
Grooming can be a deeply bonding experience for you and your cat. Regular, gentle grooming sessions, especially if introduced early and positively reinforced with treats and praise, can strengthen your relationship. For some cats, grooming is incredibly soothing.
Furthermore, proper grooming can prevent behavioral issues. Cats that are uncomfortable due to mats or painful nails may become irritable, aggressive, or withdrawn. By addressing these physical discomforts, you contribute to a happier, more well-adjusted cat.
Conclusion: A Commitment to Well-being
In conclusion, the notion that indoor cats are exempt from regular grooming is a misconception. From preventing painful mats and dangerous hairballs to ensuring healthy skin and allowing for early detection of health issues, grooming is an indispensable part of responsible cat ownership. It’s an act of love that contributes significantly to your indoor cat’s comfort, health, and longevity, ensuring they continue to purr contentedly for years to come. So, grab that brush, gentle clippers, and embark on a regular grooming routine – your cherished feline companion will thank you for it.
How to Trim Your Cat’s Nails at Home
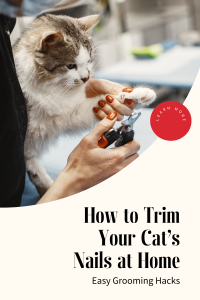
Paw-dicure at Home: A Gentle Guide to Trimming Your Cat’s Nails
Trimming your cat’s nails can seem like a daunting task, filled with visions of scratches and struggles. However, with the right approach, patience, and a little practice, it’s a vital grooming ritual that can be a stress-free experience for both you and your feline friend. Regular nail trims are essential for your cat’s health and well-being, preventing painful ingrown nails, reducing damage to furniture, and making playtime much safer for everyone involved.
Why Trim Your Cat’s Nails?
Unlike dogs, cats’ claws are retractable, but they still grow continuously. Without regular trimming, they can become too long, curving inward and potentially growing into their paw pads, causing pain, infection, and difficulty walking. Long nails can also snag on carpets or furniture, leading to painful tears or injuries. Beyond these health considerations, trimmed nails simply make living with your cat more comfortable for both of you, reducing accidental scratches during play or petting.
What You’ll Need: The Right Tools
Before you begin, gather your supplies:
- Cat-Specific Nail Clippers: There are various types, including scissor-style and guillotine-style. Choose the type you feel most comfortable with. Ensure they are sharp to make a clean cut.
- Styptic Powder (or cornstarch/flour): This is your safety net. In case you accidentally cut too deep and hit the “quick” (the sensitive part of the nail containing blood vessels and nerves), styptic powder will quickly stop the bleeding.
- Treats: Positive reinforcement is key! Have plenty of your cat’s favorite treats on hand.
- A Towel (optional): For wrapping a wriggly cat if needed.
- Good Lighting: Essential for clearly seeing the nail.
The Gentle Approach: Steps for Success
- Choose the Right Time: Select a moment when your cat is relaxed and calm, perhaps after a nap or during a quiet cuddling session. Avoid times when they are overly playful or stressed.
- Get Them Used to Paw Handling: If your cat isn’t accustomed to having their paws touched, start slow. Gently touch their paws, extending a toe and then releasing it, rewarding with treats and praise. Do this frequently until they are comfortable.
- Identify the Quick: Hold your cat’s paw gently and extend a claw by gently pressing on the top of the paw and the paw pad. You’ll see the translucent claw. Inside, there’s a pinkish area – this is the quick. You want to cut only the clear, pointed tip of the nail, avoiding the quick. For dark-nailed cats, the quick is harder to see, so err on the side of caution and only snip the very tip.
- The Snip: With your clippers, make a swift, clean cut just below the quick. If you’re unsure, it’s always better to cut too little than too much. You can always trim more later.
- One Nail at a Time (if necessary): Don’t feel pressured to do all 18 claws at once (remember, cats have five toes on each front paw and four on each back paw, with the dewclaw on the inner front paw). If your cat becomes agitated, stop, give them a treat, and try again later. Focus on getting one or two nails done per session if that’s all they can tolerate.
- Positive Reinforcement: After each successful trim (or even just trying), lavish your cat with praise and immediate treats. This creates a positive association with nail trimming.
- Address Any Accidents: If you accidentally cut the quick and it bleeds, don’t panic. Apply styptic powder or cornstarch/flour with gentle pressure until the bleeding stops. Reassure your cat and stop the session for the day.
Tips for a Smoother Experience:
- Start Young: Introduce nail trimming early in your cat’s life to acclimate them.
- Consistency is Key: Trim nails every 2-4 weeks, depending on your cat’s growth rate. Regular trims make the quick recede, making future trims easier.
- Wrap if Needed: For a very squirmy cat, gently wrap them in a towel (leaving one paw exposed at a time) for added security.
- Enlist Help: A second person can help hold and distract your cat with treats while you trim.
- Stay Calm: Cats pick up on your energy. If you’re stressed, they will be too.
- Know When to Call a Pro: If you’re truly uncomfortable or your cat is overly aggressive, don’t hesitate to ask your veterinarian or a professional groomer for assistance. They can often provide a demonstration or trim the nails for you.
With patience, positive reinforcement, and the right tools, trimming your cat’s nails at home can become a routine part of their care, contributing significantly to their overall health and comfort.
10 Vet-Approved Tips for a Healthier Cat!
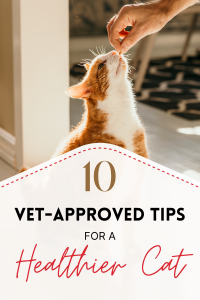
Unlocking a Lifetime of Purrs: 10 Vet-Approved Tips for a Healthier Cat
Cats are enigmatic creatures, celebrated for their independence, grace, and sometimes, their mysterious ways. As devoted cat parents, we want nothing more than for our feline companions to live long, healthy, and happy lives. While their self-sufficient nature might lead some to believe they require minimal care, the truth is that proactive measures and attentive observation are key to ensuring their well-being. To help you navigate the world of feline health, we’ve compiled ten vet-approved tips that can make a significant difference in your cat’s vitality and longevity.
1. The Foundation of Health: A High-Quality, Balanced Diet
Just like humans, a cat’s health begins with what they eat. Cats are obligate carnivores, meaning their bodies are designed to thrive on a diet rich in animal protein. Look for cat foods where meat, poultry, or fish are listed as the primary ingredients. Avoid foods with excessive fillers, by-products, or artificial additives.
Veterinarians often recommend incorporating wet food into your cat’s diet, as it provides crucial hydration that dry kibble alone often lacks. Many cats, especially those on an exclusively dry food diet, can be chronically dehydrated, which can contribute to urinary tract issues and kidney problems. Discuss your cat’s age, activity level, and any specific health concerns with your veterinarian to determine the best nutritional plan and appropriate portion sizes. Free-feeding (leaving food out all day) can lead to obesity, a common and serious health issue in cats.
2. Hydration is Key: Encouraging Ample Water Intake
Building on the previous point, proper hydration is paramount. Cats, as descendants of desert dwellers, don’t have a strong thirst drive. This makes it challenging to ensure they drink enough water. Beyond wet food, consider investing in a pet water fountain, as many cats are attracted to the flowing water. Offer multiple water bowls in different locations, ensuring they are clean and refilled daily. Some cats even prefer ceramic or glass bowls over plastic.
3. The Power of Prevention: Regular Veterinary Check-ups
Even if your cat appears perfectly healthy, annual (or biannual for senior cats) veterinary check-ups are non-negotiable. These routine visits allow your vet to perform a thorough physical examination, detect subtle changes that might indicate early-stage health issues, and keep vaccinations up-to-date. Early detection of conditions like dental disease, kidney disease, hyperthyroidism, or diabetes can lead to more effective treatment and a better prognosis. Your vet can also provide personalized advice on parasite prevention (fleas, ticks, worms) based on your cat’s lifestyle.
4. Dental Health Matters: Beyond Fresh Breath
Dental disease is one of the most common health problems in cats, affecting a vast majority of felines over the age of three. Plaque and tartar buildup can lead to gingivitis, painful extractions, and even systemic health issues if bacteria from the mouth enter the bloodstream.
While regular professional dental cleanings under anesthesia are often necessary, you can support your cat’s oral health at home. Introduce tooth brushing with a cat-specific toothbrush and toothpaste (never human toothpaste!) gradually and patiently. Dental treats and certain dental diets can also help, but always consult your vet for the most effective strategies for your cat.
5. Get Them Moving: Regular Exercise and Play
Obesity is a growing epidemic among domestic cats, leading to a myriad of health problems including diabetes, arthritis, and heart disease. Regular exercise is crucial for maintaining a healthy weight and providing mental stimulation.
Engage your cat in interactive play sessions daily using wand toys, laser pointers (but always end with a tangible reward like a treat to prevent frustration), or puzzle feeders that encourage them to “hunt” for their food. Cat trees, climbing shelves, and scratching posts satisfy their natural instincts to climb, scratch, and observe their surroundings from elevated perches, contributing to both physical and mental well-being.
6. The Litter Box Lowdown: Cleanliness and Accessibility
A clean and appropriately placed litter box is vital for both your cat’s physical and psychological health. Cats are fastidious creatures and can develop litter box aversion if their environment isn’t up to their standards.
Scoop the litter box at least once daily, and thoroughly clean and replenish the litter entirely every 1-2 weeks, depending on the type of litter. The general rule of thumb for multi-cat households is one litter box per cat, plus one extra. Ensure the litter box is in a quiet, accessible location, away from their food and water bowls. Changes in litter box habits (e.g., urinating outside the box, straining, frequent visits) warrant immediate veterinary attention, as they can be signs of serious medical conditions.
7. Grooming for Good Health: More Than Just a Pretty Coat
While cats are renowned self-groomers, they still benefit from human assistance, especially long-haired breeds or those with mobility issues. Regular brushing helps to remove loose fur, preventing uncomfortable mats and reducing hairballs. It also stimulates blood circulation to the skin and distributes natural oils, leading to a healthier, shinier coat.
Use grooming sessions as an opportunity to check for any lumps, bumps, parasites, or skin irritations. Regular nail trims are also important to prevent ingrown nails and discomfort. If your cat resists grooming, introduce it gradually with positive reinforcement.
8. Mental Stimulation and Environmental Enrichment:
Boredom can lead to stress and behavioral problems in indoor cats. Provide a stimulating environment with a variety of toys, scratching surfaces (both horizontal and vertical), and opportunities for vertical exploration (cat trees, shelves). Rotate toys regularly to keep things interesting. Consider window perches where your cat can watch birds and the outside world. Puzzle toys that dispense treats can also provide engaging mental challenges.
9. Spay or Neuter: A Crucial Step for Health and Behavior
Spaying or neutering your cat offers numerous health and behavioral benefits. For females, it eliminates the risk of uterine infections and tumors, and significantly reduces the risk of mammary cancer. For males, it reduces the risk of testicular cancer and certain prostate problems. Beyond health, it often curtails undesirable behaviors such as spraying, roaming, aggression, and the incessant vocalization associated with heat cycles. It also plays a vital role in controlling pet overpopulation.
10. Be an Observer: Recognizing Subtle Changes
Cats are masters at hiding illness, a survival instinct from their wild ancestors. As a result, subtle changes in their behavior or routine can be the earliest indicators of a health problem. Pay close attention to changes in appetite, thirst, litter box habits (frequency, volume, consistency), activity levels, sleep patterns, grooming habits, and vocalizations. Any sudden or persistent changes warrant a call to your veterinarian. Early intervention can make a world of difference in the outcome of many conditions.
By implementing these ten vet-approved tips, you’re not just providing basic care; you’re actively investing in your cat’s long-term health and happiness. A healthy cat is a happy cat, and the bond you share will only grow stronger with every purr.
